 Save
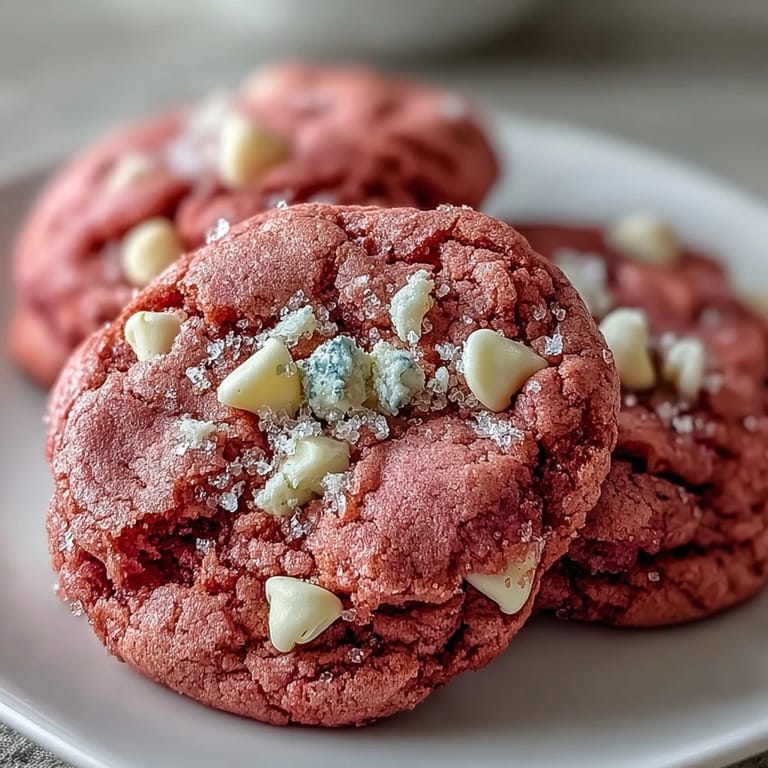
Save The morning light hit the mixing bowl just right, turning the pink dough almost neon against my countertop. I was testing gel colors for a friend's baby shower, squeezing in one more drop than the recipe called for, and suddenly I had the most outrageously cheerful cookie dough I'd ever seen. My daughter walked in, stopped mid-step, and said it looked like happiness in a bowl. I baked a test batch right then, and we ate three cookies each before breakfast was even over.
I brought a tin of these to a potluck once, labeled them only as pink cookies, and watched grown adults light up like kids. One friend asked if they tasted like strawberries, another guessed raspberry, but really they just taste like vanilla and butter with a hint of something special you can't quite name. By the end of the night, three people had asked for the recipe, and I realized I'd stumbled onto something that made people feel celebrated without any occasion at all.
Ingredients
- All-purpose flour: The backbone of the cookie, giving just enough structure without making them stiff or cakey.
- Baking powder and baking soda: This combo creates a slight rise and that perfect chewy-edge-soft-center contrast I'm always chasing.
- Unsalted butter: Must be softened to room temperature or it won't cream properly, and you'll end up with dense cookies instead of light ones.
- Granulated sugar: Creaming this with butter is what traps air and gives you that melt-in-your-mouth texture.
- Egg: Binds everything together and adds richness without weighing down the dough.
- Vanilla extract: Two teaspoons might seem like a lot, but it balances the sweetness and makes the whole cookie taste more rounded.
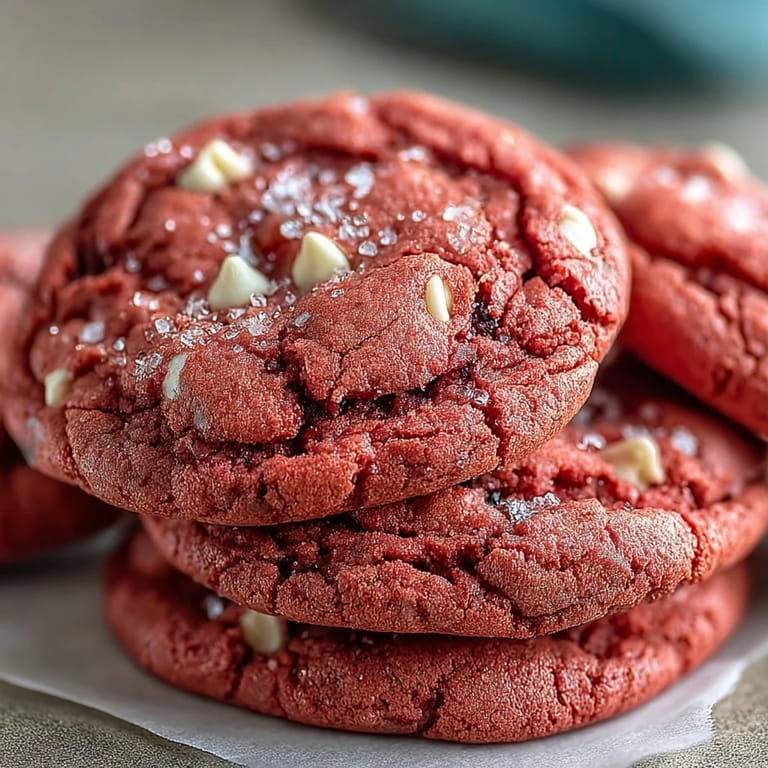
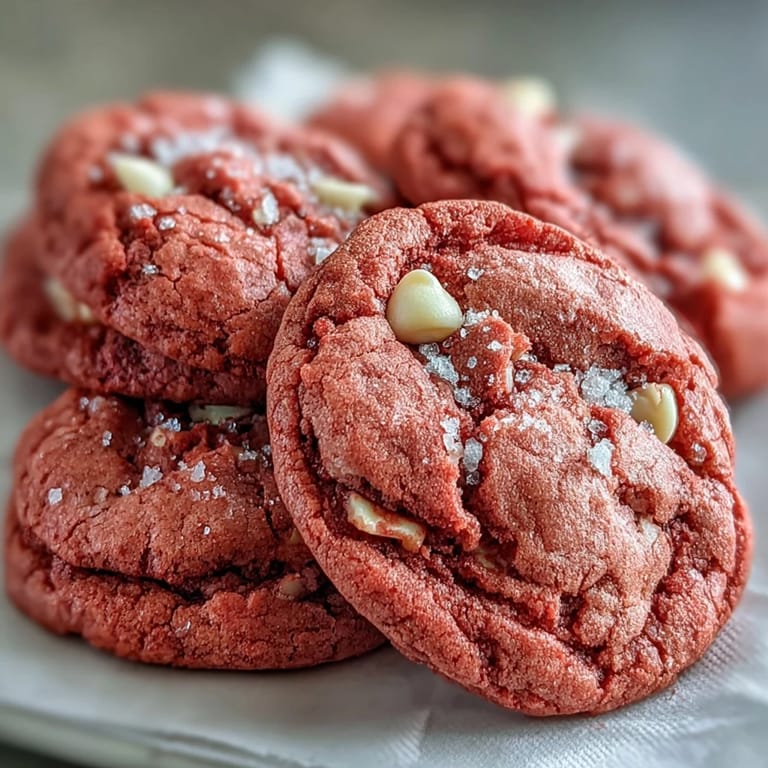
- Pink gel food coloring: Gel is key here because liquid coloring waters down the dough and mutes the color.
- White chocolate chips: They add creaminess and little bursts of sweetness that keep each bite interesting.
Tired of Takeout? 🥡
Get 10 meals you can make faster than delivery arrives. Seriously.
One email. No spam. Unsubscribe anytime.
Instructions
- Whisk the dry ingredients:
- Combine flour, baking powder, baking soda, and salt in a medium bowl until evenly distributed. This step prevents clumps and ensures every cookie rises the same way.
- Cream the butter and sugar:
- Beat softened butter and sugar on medium-high speed for two to three minutes until the mixture turns pale and fluffy, almost like buttercream. This is where the magic starts.
- Add egg, vanilla, and color:
- Beat in the egg and vanilla until smooth, then squeeze in the pink gel food coloring and mix until the dough is evenly tinted. Don't be shy with the color.
- Combine wet and dry:
- Gradually add the flour mixture to the wet ingredients on low speed, mixing just until no streaks remain. Overmixing makes tough cookies.
- Fold in white chocolate:
- Use a spatula to gently fold in the white chocolate chips so they're evenly scattered throughout the dough. Try not to eat too many at this stage.
- Chill the dough:
- Cover the bowl with plastic wrap and refrigerate for 30 minutes. This step keeps the cookies from spreading into flat puddles in the oven.
- Prepare for baking:
- Preheat your oven to 350 degrees Fahrenheit and line two baking sheets with parchment paper. Don't skip the parchment or you'll be scraping cookies off the pan later.
- Scoop and space:
- Use a tablespoon or cookie scoop to portion out dough balls, placing them two inches apart on the prepared sheets. They'll spread just enough to need that space.
- Bake until set:
- Bake for 10 to 12 minutes until the edges look set but the centers still seem a little underdone. They'll firm up as they cool, I promise.
- Cool properly:
- Let the cookies sit on the baking sheets for five minutes before transferring them to a wire rack. Moving them too soon causes them to break apart.
 Save
Save My neighbor once told me she keeps a batch in her freezer for emergencies, which I thought was funny until I had one of those weeks where nothing went right. I pulled out four frozen cookies, warmed them for 20 seconds, and sat on the porch with a cup of tea. Something about the color and the sweetness made the day feel manageable again, and I've kept a stash ever since.
Customizing Your Cookies
I've added almond extract a few times when I wanted something a little more grown-up, just half a teaspoon changes the whole flavor profile without overpowering the vanilla. A friend swears by a few drops of rose water, which sounds fancy but actually works beautifully if you're into floral notes. You can also press extra white chocolate chips on top right before baking for a bakery-style look that makes people think you spent way more effort than you did.
Storage and Make-Ahead Tips
These cookies stay soft in an airtight container for up to a week, though they've never lasted that long in my house. If you want to bake ahead, you can freeze the dough balls on a tray, then transfer them to a freezer bag and bake straight from frozen, adding an extra minute or two to the baking time. I've also frozen baked cookies and thawed them at room temperature, and honestly, no one could tell the difference.
Serving Suggestions
I've sandwiched these with cream cheese frosting for birthday parties, and they disappeared faster than anything else on the table. They're also perfect alongside a scoop of vanilla ice cream or crumbled over strawberry shortcake for a playful twist. Sometimes I just stack them on a plate with a glass of cold milk and call it a win.
- Pair them with hot chocolate or a vanilla latte for an indulgent afternoon treat.
- Pack them in clear bags tied with ribbon for easy, cheerful gifts that people actually want.
- Serve them at baby showers, bridal events, or any gathering where a pop of color makes everything feel more festive.
 Save
Save Every time I pull these out of the oven, I'm reminded that sometimes the best recipes are the ones that make people stop and smile before they even take a bite. Bake them when you need a little brightness, and I promise they'll deliver.
Recipe FAQs
- → Why do I need to chill the dough?
Chilling for 30 minutes prevents the cookies from spreading too much in the oven, ensuring they maintain their shape and achieve the perfect texture with crisp edges and soft centers.
- → Can I use liquid food coloring instead of gel?
Gel food coloring is recommended because it provides vibrant color without adding excess liquid to the dough. Liquid coloring may alter the texture and require additional flour adjustments.
- → How do I know when the cookies are done?
The cookies are ready when the edges are set but the centers still look slightly soft. They will continue to firm up as they cool on the baking sheet, so removing them while slightly underbaked ensures the perfect chewy texture.
- → Can I freeze the dough or baked cookies?
Yes! Scoop the dough into balls and freeze for up to 3 months. Bake frozen dough balls, adding 1-2 minutes to the baking time. Baked cookies can also be frozen in an airtight container for up to 3 months.
- → What's the best way to store these cookies?
Store in an airtight container at room temperature for up to 1 week. For longer storage, freeze the baked cookies. The moisture from the white chocolate helps keep them soft and fresh.
- → Can I make these gluten-free?
Absolutely! Substitute the all-purpose flour with a 1:1 gluten-free flour blend that includes xanthan gum. The texture and taste remain virtually identical to the traditional version.